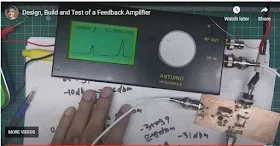
As I said a couple of days ago, Farhan has put out a very informative video on amplifier design. During the video we can see him determine bias, feedback and load levels, then select component values. We then see him actually build the amplifier "ugly style" and use his Antuino to test it. Fantastic.
Watch Farhan's video here: https://www.vu2ese.com/index.php/2020/06/18/feedback-amplifier/
I sent Farhan some of my reactions to the video. In the hope of stimulating some discussion, I repeat them here:
___________________
Wow Farhan, I really enjoyed your video and learned a lot. You definitely have the Knack for explaining this stuff.
I have been struggling to understand feedback amps for a long time. I took up this topic on pages 187-190 of the "SolderSmoke -- Global Adventures" book. I was more focused on the benefits of FB amps, and on how and why feedback affected input impedance.
I took notes as I watched:
-- I liked the fulcrum analogy.
-- Really wonderful how you describe the selection of components to get desired bias.
-- Even better when you explain tapping down of RF coil to get 50 ohms to look like 200 ohms. Great stuff.
-- Standardized on BNC. FB!
-- .1uF caps. Love them! No argument here!
-- I copied your resistor list. Will use it with Mouser.
-- Saving the pigtails. Indeed!
-- I like your ugly "resistors first" technique. I may have to move away from Manhattan.
-- Wow. Ugly circuits IN SPAAAAACE! FB!
-- 2N3904 I always think it is EBC when looking at the flat end of transistor with leads facing down. Only had reverse pinout with PN2N2222. EBC is my usual assumption.
-- I still have the big box of trifilars you left me. I use them. Thanks!
-- I like that VTVM in your Antuino. Very handy. Want one! Also, We need to get the Antuino to go down to below 455 kHz.
-- I also like your dual Return Loss and SWR display. I think in terms of SWR. Return Loss sometimes messes me up.
-- Didn't know about the Hold and Zoom feature on Antuino. FB.
-- Your measurement of the Q of the crystal was awesome.
-- I checked my soldering iron temp: I'm at 480 C A bit too hot. Will back off.
-- Good description of need for an attenuator at amp output to keep it in Antuino's range.
-- As I watched you tug on the components after the solder cooled, I remember an old and silly admonishment from the ARRL Handbook: NEVER use solder for mechanical connections. Ha! They were WRONG!
-- Demonstration of the flatness of feedback was great.
-- I found your measurement of impedance using the SWR feature of the Antuino to be very useful. Is there a chart relating the SWR/Return Loss to actual impedance values?
-- Loved your description of how output impedance affects input impedance. That is why you advised use of TIA amps in my DIGI-TIA. But now I'm thinking that if I can accurately measure impedances of non-TIA amps, I can design L networks that will keep the crystal filter passbands ripple-free, right?
-- Great explanation of the benefits of the 6 db pads at amp output. Allison often recommends this. Now I know why.
-- Wow! Now I KNOW what that two-tone box you left with me is for! Now I understand how it can be used to measure IMD on FB amps. I pulled mine out just as you began to discuss yours. Really cool.
Thanks a lot Farhan for doing this. These videos will be of long-lasting use to homebrewers around the world. I hope we will see many more VU2ESE videos like this one.
73 Bill

Farhan is a true Wizard. The best 50 minutes I have spent on electronics in a while. Watching him solder the amp while describing the process was like watching a master painter. My solder joints NEVER go together that easily. One drop of solder to connect the BNC - I have been welding them. I have to watch it about 10 more times to absorb all the info. FB!
ReplyDeleteIndeed a great video. Will watch it this evening again to pick up more details. And BNC's rock for QRP. My connector of choice on all my DIY projects (and often replacement on existing stuff).
ReplyDelete