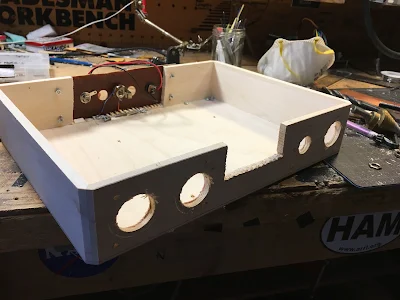
Yesterday I decided to spend some time at the bench -- I wanted to get the uBITX boxed up. My basswood box had arrived from Amazon on Friday. It was time for what George Dobbs G3RJV called "socketry."
First, the back. I figured I would need five connectors back there. Connectors for 12V DC, speaker, and antenna would be needed right away (it is my preference to have the speaker connector on the back of the BITX). Looking ahead, I might want to also have a jack for T/R control of my linear amplifier, and a jack for 24 VDC if I want to go wild and put more voltage on the drains of the IRF510s. So I put two extra holes in there.
Basswood is SO easy to cut. I put the LCD in the center of the front panel, and opted to put the board close to the front of the board. This avoids the need for jumpers to connect the Raduino to the LCD, and it keeps the lines to the front panel controls and connectors very short. I mounted the board on the spacers that came with the BITX, drilling holes the bottom of the basswood box. It all fit quite nicely.
I would need to put two jacks on the front panels: key jack and mic jack. And I'd need two controls: main tuning and AF gain. I used hole saws to cut holes big enough to accommodate the four items.
The controls and jacks were then placed on two small pieces of copper clad board. These then went on the front panel.
Wiring up the uBITX was easy. I just followed Farhan's instructions. I did the wiring AFTER placing the boards and controls in the box -- this helped me keep all the wires at their optimum length (not too long, and more important -- not too short!). If you do it this way, put a cloth over the boards so you don't drop solder blobs on the uBITX.
Farhan's uBITX fired up nicely as soon as I applied power. The receiver really sounds nice. I hope to make some contacts with it today.
Three cheers for Farhan!


