February 23, 2026
SolderSmoke Podcast #263 is available for download:
Audio: http://soldersmoke.com/soldersmoke263.mp3
Video: https://www.youtube.com/watch?v=Fn164glxQ6s
Opening
May 26, 2014, coming up on 12 years! That was the 1st podcast where Pete N6QW was interviewed by Bill in Podcast #161, which means 102 podcasts ago. 12 Years of Julian-ismo. Thanks Pete!
What to build? Question faced by VWS Makers Group and by Charlie of RedSummit RF. Regen? Test Gear? Simple oscillator?
But did you DESIGN it yourself? What does that even really mean? Barrie Gilbert in Jim Williams' book: https://soldersmoke.blogspot.com/2025/12/homebrew-you-say-but-did-you-design-it.html
Grayson KJ7UM on a podcast -- Make it your own way. Copper Clad and Glue! Manhattan style! "BUILD SOMETHING!: Tube testers not necessary. OK to call thermatrons "vacuum tubes." No ruling on calling them "valves" yet.
Pete:
-- When hams were hams -- Turning a Heath monobander into a tribander
-- Simple SSB
-- W7ZOI rigs
-- The Yaesu FT-101
SHAMELESS COMMERCE DIVISION: Mostly DIY RF! Patreon! But no more Amazon. We do not want to help Bezos make more money. Even if this will cost us. So please, consider a donation or a Patreon sponsorship instead. But no more Amazon through SolderSmoke.
Bill:
-- Dominican Republic to Puerto Rico on 2 meters -- status report.
-- Working Australia on 20 meter SSB in the morning.
-- The SpiderWeb net.
-- The Hubble Space Telescope -- an old friend
-- One contact on Straight Key Night (Dean reminded me). I worked NB1U on 20 meters with QCX from KD4EBM.
Dean:
-- The University of Michigan ant the Direct Conversion receiver project.
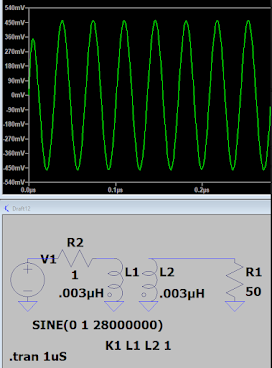
-- Boxing up the amplifier. A tale of woe. Identifying oscillations. A QSO with the Dominican Republic: https://soldersmoke.blogspot.com/2026/02/a-qso-with-dean-kk4das-northern.html
Ian VK3MO Huge antennas, big signal, friendship with WA3O https://soldersmoke.blogspot.com/2025/11/vk3mo-and-wa3o-brotherhood-of-ham-radio.html
Bob KD4EBM 2 meter propagation info
Todd K7TFC -- Mostly DIY RF
Mike K6STR Worked Pete on 40, building for CW and SSB on 2 meters
Grayson KJ7UM German Avionics, MMM Origin. Old Steampunk Homebrew rig: https://soldersmoke.blogspot.com/2025/12/a-very-interesting-old-steam-punk.html
Phil W1PJE Forrest Mims III Mims's sad denial on climate change.
Ciprian YO2DXE Heard the SAQ Alternator see: https://soldersmoke.blogspot.com/2025/12/alexanderson-alternator-on-172-khz.html
Tom NS6T: Very useful azimuth map with grey lines: https://ns6t.net/AzShadowMap/
Walter KA4KXX -- 20 meter Direct Conversion Receiver. FB Walter!
WN2A Mike Dos Equis man is BACK! https://soldersmoke.blogspot.com/2026/01/hes-back-dos-equis-man-most-interesting.html
KB4HG Rhett: On USB on the Old Military Radio Net with a PRC-74. Want one!